APACHE CONFIGURATION IN LINUX UBUNTU -16.04.3-server
- Sankalpa H.T.S
- Jun 28, 2018
- 5 min read


In this document we are going to configure the Apache Web Server (192.168.200.200) by creating a specific user named amaa and make Sparse Files in the Web Server and also browse via mozilla firefox in a client machine (192.168.200.4).
Set Static IP To The Server
In the beginning I gave a static IP address for the server that we are going to configure Apache.

Installation
If you do not already have Apache installed, you can do so now by issuing following commands:

When we update our server it didn’t update. We can simply solve that error by adding nameserver and search option to the /etc/resolve.conf file as below.

You should see the file as above. Below those comments add that lines..

Now try to update again.

You can see now it’s working as below.

Let’s install Apache2. First search that package by typing this.
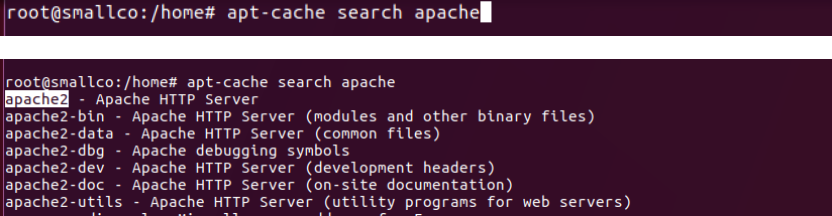
After you find the package install it by using apt-get install command. Remember I am using apt-get install instead of sudo apt-get install because I’m in the super user mode.


I have already installed the Apache2 in my server.
Add a User
Add a user named amaa using below command.

--home flag for creating a user directory in the home directory. --disabled-password flag for create a user without a password. --shell flag for create that user in the shell also.

See the home directory to confirm the user directory is created.

Create Demo Page for The Virtual Host
In that user directory create a file index.html as /home/amaa/web/public_html/index.html

In this file, create a simple HTML document that indicates the site it is connected to. My file looks like this.

Save and close the file when you are finished.
Grant Permissions
Now we have the directory structure for our files, but they are owned by our root user. Here we want our regular user to be able to modify files in our web directories, we can change the ownership by doing this.

Check the changed ownership.

We should also modify our permissions a little bit to ensure that read access is permitted to the general web directory and all of the files and folders it contains so that pages can be served correctly:

Your web server should now have the permissions it needs to serve content, and your user should be able to create content within the necessary folders.
Configuration
The main configuration details for your Apache server are held in the “/etc/apache2/apache2.conf” file. This file is divided into three main sections: Configuration for the global Apache server process, Configuration for the default server, and configuration of Virtual Hosts.
Create a backup file of the apache.conf as apache.conf.backup and start configure that main configuration file.

When open that file it will show like below.

In this file we should add our directory structure for our Virtual host. Find the place pointed.

Add these lines as shown.

Now we configures our main configuration file. Save and exit.
Create New Virtual Host File
Start by copying the file for the first domain:

Check whether file we copy actually copied.

Open the new file in your editor:

The file will look something like this

We will customize the items here for our domain and add some additional directives. This virtual host section matches any requests that are made on port 80, the default HTTP port.
First we need to change the ServerAdmin directive to an email that the site administrator can receive emails through. After this, we need to add two directives. The first, called ServerName establishes the base domain that should match for this virtual host definition. This will most likely be your domain. The second, called ServerAlias, defines further names that should match as if they were the base name. This is useful for matching hosts you defined, like www:
The only other thing we need to change for a basic virtual host file is the location of the document root for this domain. We already created the directory we need, so we just need to alter the DocumentRoot directive to reflect the directory we created:
And specially we will create ErrorLog and CustomLog in a special directory named amaa.
In total, our virtual host file should look like this:

Save and close the file.
As defined in above virtual host file we should create a directory named amaa in default apache log directory in /var/log/apache2/: After restart Apache it will automatically creates error.log and access.log in amaa directory. We will see it after restart the service later.

Enable the New Virtual Host File
Now that we have created our virtual host file, we must enable them. Apache includes some tools that allow us to do this. We can use the a2ensite tool to enable each of our sites if we have more than one:

When you are finished, you need to restart Apache to make these changes take effect:

See syslog for check if the service restart correctly:

Now let’s check in /var/log/apache2/amaa/ whether error.log and access.log are created.

Check Curl Command
Curl IP address

Curl by ServerName:

Curl by ServerAlias

Our site is working properly.
Set Up Local Hosts File (Optional)
Our client machine:

If you haven't been using actual domain names that you own to test this procedure and have been using some example domains instead, you can at least test the functionality of this process by temporarily modifying the hosts file on your local computer.
This will intercept any requests for the domains that you configured and point them to your VPS server, just as the DNS system would do if you were using registered domains. This will only work from your computer though, and is simply useful for testing purposes.
Make sure you are operating on your local computer for these steps and not your VPS server. You will need to know the computer's administrative password or otherwise be a member of the administrative group.
Edit your Local file with administrative privileges by typing:

It will look like following:

Add following lines to the bottom of my hosts file:

Test your Results
Curl IP address

Curl by ServerName:
Curl by ServerAlias:

Curl using incorrect name: here I used www.smallco.amaa.com:

It will gave us error output.
As this site works well, we’ve successfully configured virtual host on the server.
Now let’s move to another important task:
Create Sparse Files
Use truncate command to make sparse files. Let’s create 2 files with .jpg extension as amaa1 and amaa2. --size flag for define the file size (10M-10Megabytes , 10G-10Gigabytes).

Here I use special command dd other than truncate command to create a 100Megabytes file in order to make amaa3.jpg file. I am using /dev/zero file to create my new file.
bs- block size
count- how many times as block size

Difference Between truncate file and dd file
Checking actual size of amaa1.jpg, amaa2.jpg and amaa3.jpg files using du -sh command.

As you can see here the file we created using dd command has the 100M actual size. But truncate files don’t.
Now let’s check –apparent-size of files we created:

You can see here both truncate files and dd file have the sizes we define:
Let’s add a directory structure and credentials for our files we created in the main configuration file apache2.conf

Restart Apache

See syslog for check errors when restarting the service:

Test Your Results
Curl IP address:

We can test our setup easily by going to the domain/ IP address that we configured in our browser:

Apache server works properly. But this is not we configured here. Where are the filse we created in public_html folder ?
Let’s troubleshoot the problem:
Our configuration directly pointed to the index.html file we created in public_html folder. Let’s rename it as notindex.html.

Now see curl result:

It seems working properly. Let’s confirm it by browsing our domain.

See access.log in /var/log/Apache2/amaa/access.log file:

If you followed along, you should now have a single server handling two separate domain names. You can expand this process by following the steps we outlined above to make additional virtual hosts. There is no software limit on the number of domain names Apache can handle, so feel free to make as many as your server is capable of handling.
References:
https://www.digitalocean.com/community/tutorials/how-to-set-up-apache-virtual-hosts-on-ubuntu-14-04-lts


Comments