Configure the windows server 2016 nano server in vmware and 'DNS' service inside the nano server
- Sankalpa H.T.S
- Jul 30, 2019
- 5 min read


Configure the nano server
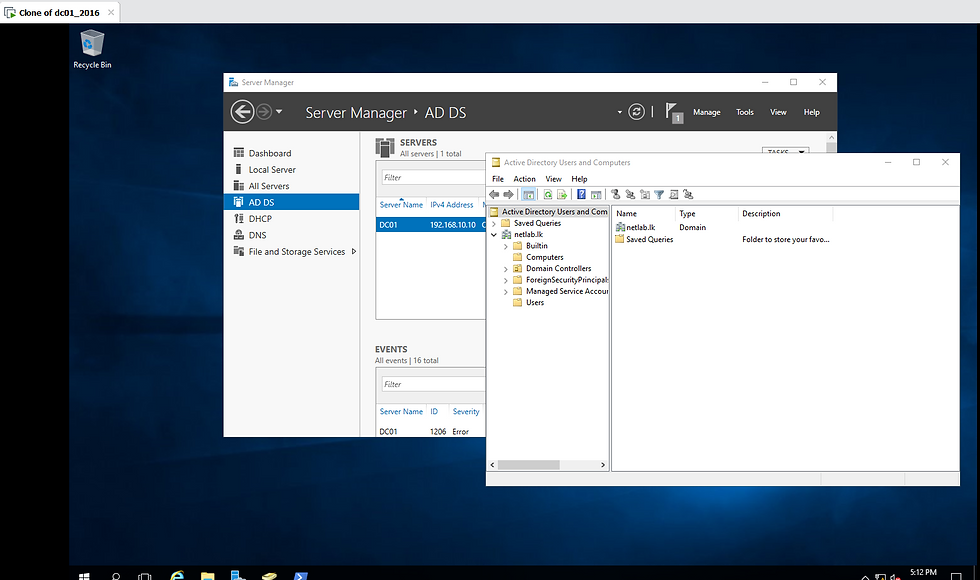
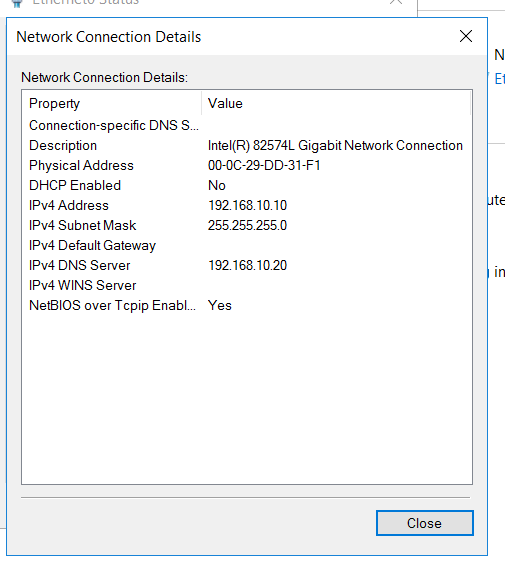
To create the virtual hard drive for windows nano server I'm using the 'dc01' 2016 windows server. Here is the dc01's network configurations in the beginning. As you can see this server has already configured AD-DS (Active Directory Domain Services). Domain name is netlab.lk , ip address is 192.168.10.10

Inside this server I have already configured AD-DS, DNS (which has automatically installed when AD-DS installing ) and DHCP ( DHCP pool starts ip address of 192.168.10.100).
Insert the windows server 2016 .iso image to the machines' CD/DVD drive.

Then open the DVD drive.

Copy the nano server folder.

Create a folder named 'nano' inside the C:\ partition

Paste the 'NanoServer' folder which is copied, inside the newly created nano folder


On dc01, open an elevated windows PowerShell prompt. Change to the root directory of drice C:\nano\NanoServer\NanoServerImageGenerator\

Contents inside the 'NanoServerImageGenerator' folder

Import windows PowerShell modules

Create a virtual hard drive
( When you use the below command, it is successfully creating the virtual hard drive. But when you run it, it is not showing the network adapters. You will understand this in the later within this documentation. Remember in later I will recreate the virtual hard drive using appropriate options)


Check inside the NanoServer folder to confirm that the specified virtual hard disk is created.


Now we need to convert the .vhdx file into .vmdk in order to create a virtual machine using that virtual hard disk. I copy .vhdx file from the virtual machine's to my real machine's desktop.

I'm using "StartWind V2V Image Converter" to this converting process. Follow these steps,


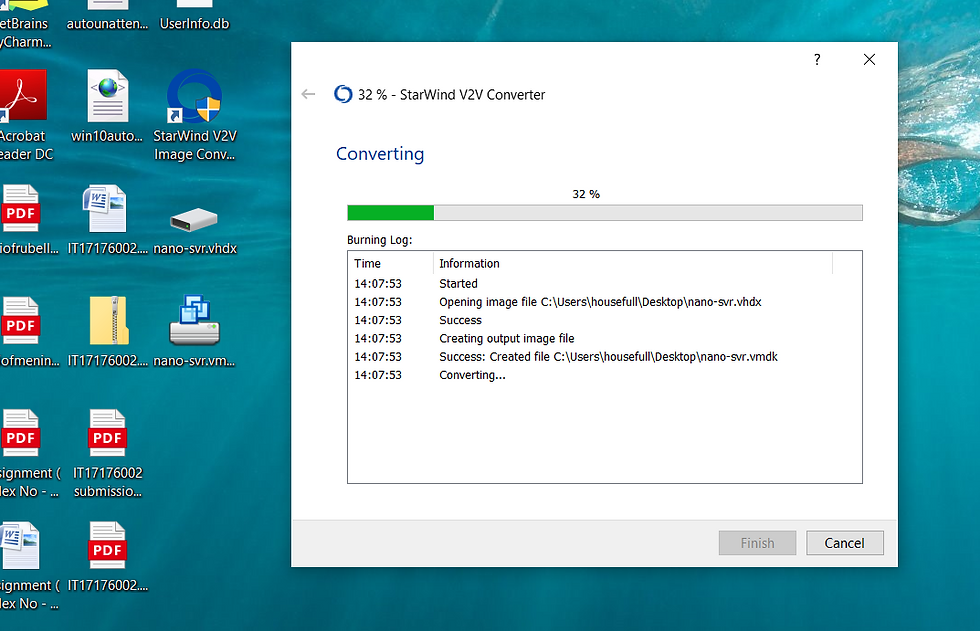
You can see the created .vmdk file below.

Create a new virtual machine. Follow these steps,


Here we're facing a problem. I will show you the problem which occurs if we use SCSI for disk type. Continue the steps,


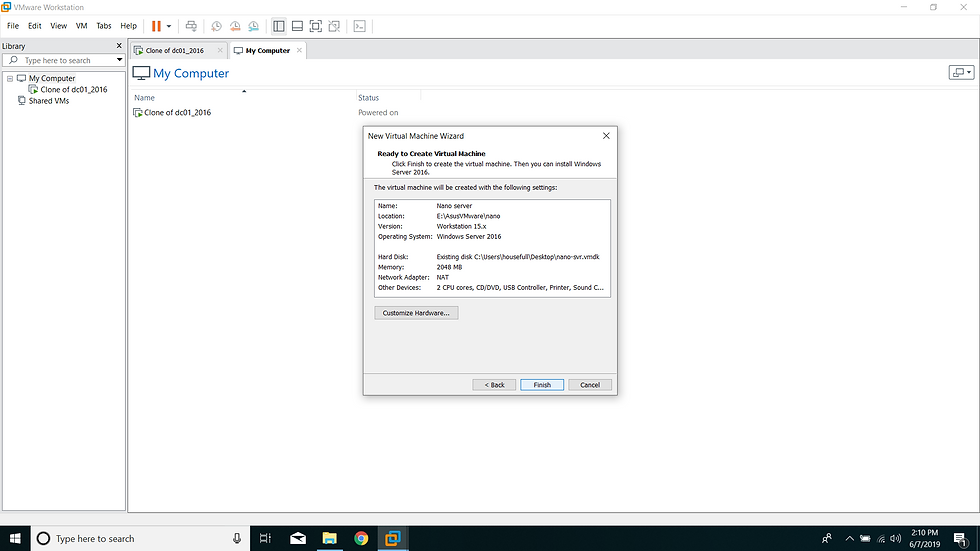
My dc01 server is in the VMnet4 virtual network. There for I'm also adding the nano server to the same network.

Power on the newly created virtual machine.

In the startup you will be getting this type of error.

To solve that problem you should select the Disk Type as 'IDE' when you are creating the nano server virtual machine.

Then you can turn on the nano server without interrupts.

Login as admin using the credentials you provide when creating the virtual hard drive using PowerShell.

Check the network.


Ooooops. Network adapter doesn't appear.
In the beginning I have mentioned we might face this kind of situation and I will be recreating the virtual hard drive again. This is it. Now I'm gonna recreate the virtual hard drive by removing previous instances in my real machine and also in my dc01.
Real machine,

dc01,


To install the network adapter drivers to nano server we need to add an special option. Read below to get an idea about the available options to install with the nano server.
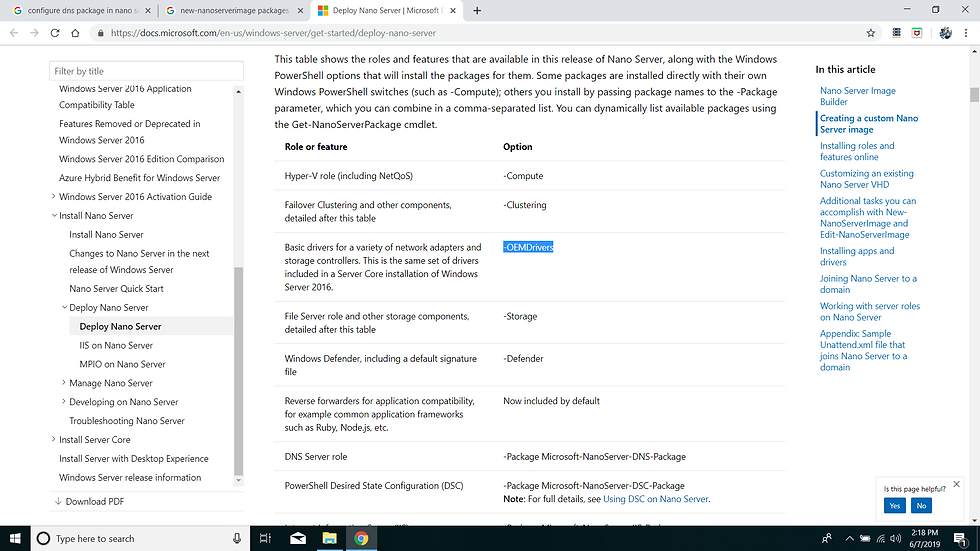
We are going to configure DNS service inside the nano server. To configure that we need DNS server role. I'm taking '-OEMDrivers' and '-Package Microsoft-NanoServer-DNS-Package' options. Run the below command in dc01,


Confirm the .vhdx creation,

Do the rest of steps as below,


Turn on the nano server, log using Admin credentials,

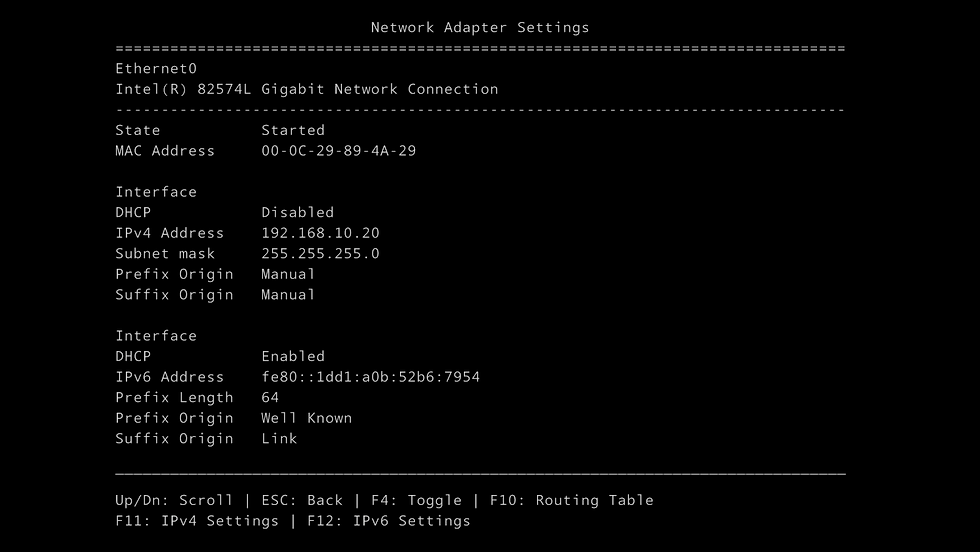
Check the network settings,


Now we have the network adapter which we added.
When I check the IP address of it I can see it has 192.168.10.100 . This because, I have configured DHCP server in dc01 and I connect this nano server to the same network VMnet4.

In DHCP managerin dc01, I can see the leased addresses.

In order to configure DNS service inside the nano server I want a static IP address for it. So I will disable the DHCP in the network adapter and give a static IP address of 192.168.10.20


Hit 'Enter' key

Hit 'Enter' to save

Hit 'Enter' to get back to IP address settings
Now dc01 and nano-svr are in the same network. Check the connectivity between these two machines.

Getting request timed out reply. This because of the windows firewall rules inside the nano-svr. We need to allow the incoming ipv4 traffic.

Press enter selecting "File and Printer Sharing (Echo Request - ICMPv4-In)"

Press f4 to enable the rule.

Press ESC key to get back to the home screen.

Again check the connectivity between dc01 and nano-svr

Add nano server to the domain
On dc01, in the administrator: Windows PowerShell window, run "djoin.exe /provision /domain netlab.lk /machine NANO-SVR /savefile .\odjblob.txt". This creates a file that you will use to complete the process of adding nano server to the domain.


The following commands are used to enable windows PowerShell remoting


In the windows PowerShell credential request dialog box, in the password box, type the password of the NANO-SVR Administrator, and clock OK.

By changing the prompt you can clarify that you are now inside the nano-svr

To enable file sharing through the firewall, run below command,


Map a network drive to the C:\ drive on nano server.
(\\192.168.10.20\c$)

Switch to the network drive and then copy C:odjblob.txt from the dc01 to the root of the C drive on nano server.

Copy from dc01,

Paste to nano-svr,

Confirm the copied file exist in nano-svr C:\

Run below command to complete the process of adding the computer to the domain.


Restart nano-svr,


Enter the Admin credentials,

In the domain section you can see the netlab.lk domain.

In our dc01's domain controller, computer section we can see the nano-svr.

Performing remote management for DNS confiduration
Enter to the nano-svr remotely,


Once you have entered the PS Session of the nano-svr, the first step is to unpack the DNS server full role there.

It is showing me an error.

Find-PackageProvider is also giving me an error which says check your internet connection.

In my nano-svr I only have the VMnet4 network adapter. I don't have internet access for it. I'm gonna add a bridged adapter to the nano-svr and get internet access using my real machine's WI-FI connection,

Confirm the bridged adapter is successfully added.


Yes, I'm getting 192.168.1.4 from my WI-FI

Connect remotely to the nano-svr from dc01.

Now run Find-PackageProvider


Install the NanoServerPackage


I'm getting below error,

To solve that use the below command first,

Then install the NanoServerPackage again

Import the NanoServerPackage's package provider

Check the existing packages on the nano-svr,

Unpack the dns-server-full-role


This will extract the dns server role and its cmdlets. Now you need to import the DnsServer module and get the dns server management cmdlets operational.


At this point you have installed the DNS server role and DNS management tools on the nano server. You can now perform DNS administrative operations on this DNS server.
Perform DNS operations
Let's create a new zone as nibm.lk.
Add a forward zone.

Confirm the zone creation.

Add 'A' record to that zone,

Add a reverse zone. Type the third command of below screenshot,

Confirm the zone creation,

Without adding a record to the reverse zone let's try our forward zone process. Change dc01's DNS server address into 192.168.10.20 ( nano-svr's IP address )

In dc01, query to the DNS server using nslookup command;
Query to the added forward zone resource record "nano-svr.nibm.lk"

It gives a reply with address of 192.168.10.20 . Our forward zone DNS resolving works perfectly.
Now try to query using an IP address of 192.168.10.20 . If reverse zone DNS resolving works this should give us a reply of "nano-svr.nibm.lk"

By observing above result we can clarify our reverse zone DNS resolving is not giving a result. This because we haven't added a PTR record yet to the reverse zone. Let's add a PTR record.

Get the added reverse zone resource records,


Now query using an IP address of 192.168.10.20 . If reverse zone DNS resolving works this should give us a reply of "nano-svr.nibm.lk"

By observing above result we can confirm that we have successfully configured the DNS service on nano-svr ( nano-svr is the server name of the nano server in this practical ) in windows server 2016 with forward and reverse zones.


Comments